I hope you enjoy making this cute little birdseed ornament recipe as much as the birds enjoy eating them!!! This tutorial is inspired by the “nature themed” Target wedding I posted last week. I showed the heart shaped birdseed ornaments as favors to give to the guests. These would be cute to give as wedding favors, but would also be a fun little gift to give a friend or teacher at Christmas.
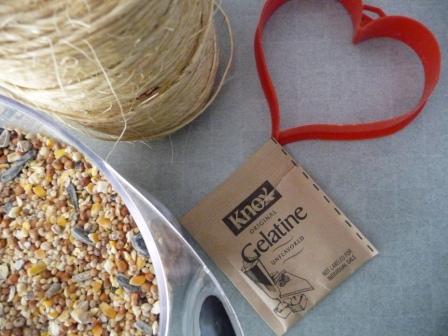
Things needed for this project:
Makes 1 Large ornament or 2 med/small size
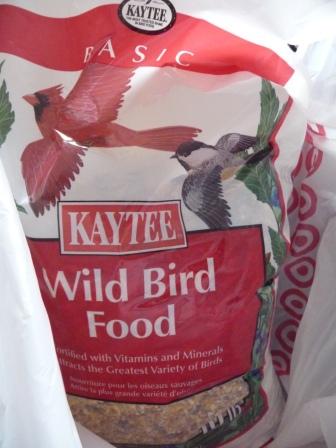
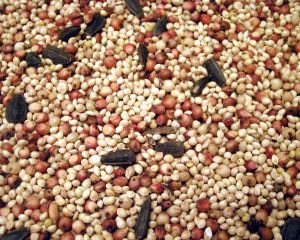
3/4 c. Birdseed – (I purchased this birdseed mix from Target)
1 sm packet of Knox
Twine, raffia or wire for hanger (don’t use bright colored ribbon, it scares the birds away)
a mold of some sort….. I used a heart shaped cookie cutter
1/4 c. water
Dissolve a packet of Knox in 1/4 c. of water, bring to simmer and stir until dissolved. Let cool slightly.
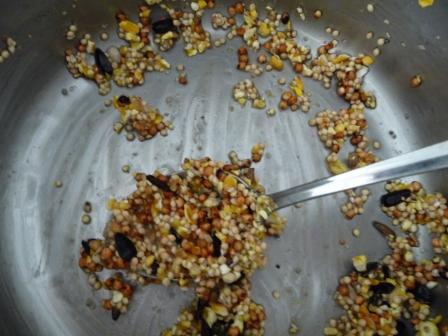
Add 3/4 c. bird seed and mix very well until seeds are coated. Notice the picture of the birdseed in the pan, I don’t have a lot of excess liquid…if you have a lot of puddling add a little more seed.
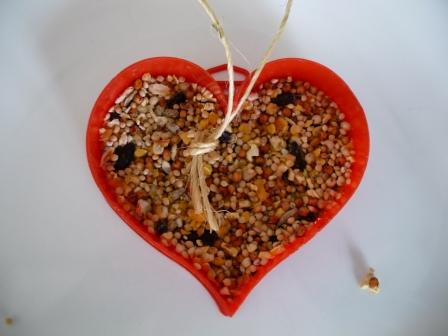
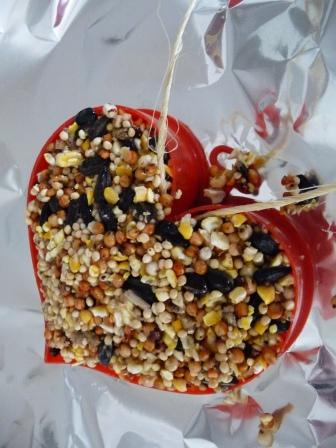
Spoon the seeds into a mold, filling it half way up, and pressing down to make sure it is well packed. Lay tied twine on top of the pressed seed, and fill up the rest of the way so twine is fully covered. I put mine in the freezer for a few hours so I could easily unmold the ornament. Let it dry out for a few days …flipping it so it drys out completely on both sides and all the way through. You want it really hard and totally dried out so you can hang it in your tree. Position it in a place where birds can rest and eat.
**I just added a few revisions to the instructions. Someone mentioned in a comment that their ornament got moldy after it was sitting a few days. I haven’t had that happen, but I added that you need to flip it so it dries out really well on both sides and all the way through. Mold needs two things to grow …moisture and darkness.
I’ve never made these in a large quantity and very far in advance. Caution: If you are making these for a wedding, I would suggest doing a trial run. If for some reason you don’t have success making them, I would decide on a different favor for your wedding…I would hate for you to have stress. I plan on testing them myself. The biggest thing I would focus on is totally drying them out, even if it takes a week. After they get hard, I would find a place to hang them all so there is air in between each one and I would store them hanging. I suggest wrapping them in cyclophane with a cute twine or ribbon as close to the wedding as possible. Then all you need to add is a sticker or a cute tag. * You could also place a cut straw in the middle or upper lobe of the heart and press the seed around it. You would remove the straw after it is dry. This will leave you with a hole for your ribbon to slide into. (Just another idea)
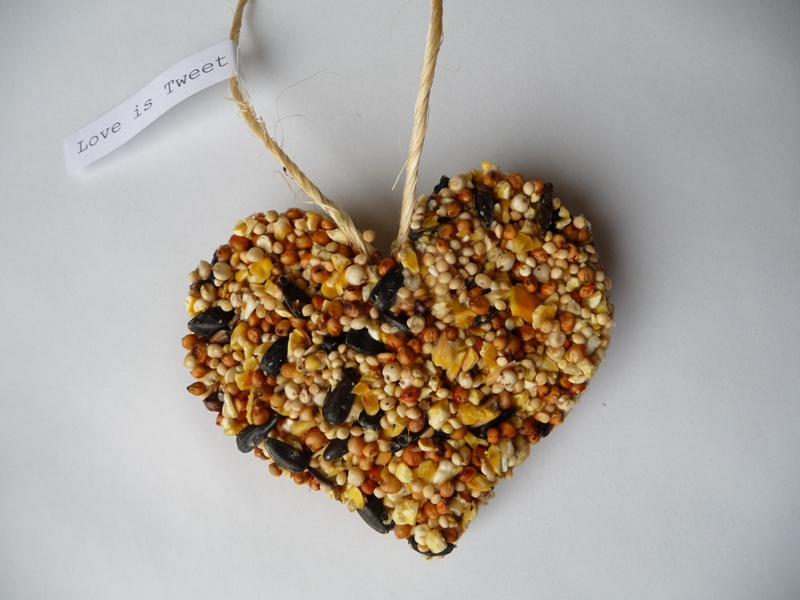
If using it as a favor, wrap in clear cellophane and tie with raffia or twine and attach a cute tag.
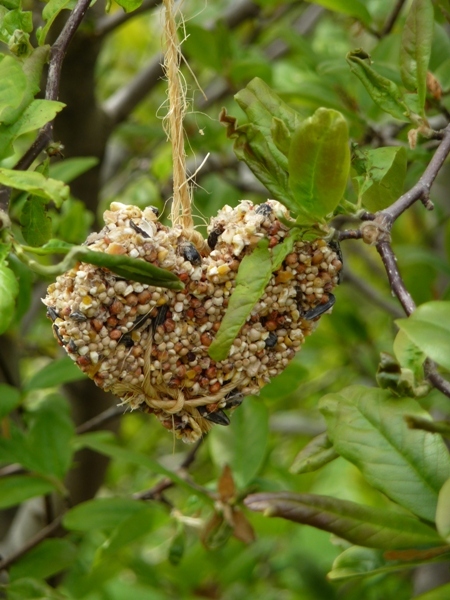
I snapped a picture of my half eaten birdseed feeder, proof of the birds love!!! :)…. I wish I could catch them in action!!!
I’m linking up to Tasty Tuesday and DIY Day !
These are so cute! We’re big bird lovers at my house! These would be great in the trees. You have a great blog. I will be back to visit soon!
THANK YOU so much for posting this!
I ‘ve been wanting to do this for ages & thought it would be tougher!!!
Yea! What a great Christmas gift too, right when the peeps need them most!
All I need is my Knox, I’m so doing some tomorrow!!!
L~
This is so fun! I’ll be making them with my kiddos this summer! Thanks…great post!
Thank you so much for dropping by, I hope you have fun making the bird feeders!!
Rene’
Thank you so much for stopping by… This is the first time I’ve made them with Knox, the others were with crisco. The first day I put them out I didn’t see action, the next day I had beautiful cardinals stop by for a visit!!
Crisco just doesn’t cut it unless it’s freezing out
I laid one on top of the hot tub cover, it’s more visable, so it’s been easier to check out the visits……..It stinks though, every time I go to snap a pic, they fly away….
Thank you for the comment!!! I hope you and your kids enjoy making the ornaments…the birds seem to really enjoy eating them
So cute!!! Great recipe! And great gift!
Thank you for the sweet comment, I’m so glad you came by…..
Rene’
This is brilliant! I love your project!
thank you so much!
I love this idea! I’m not sure what I could use it for yet, but I’ll think of something!
I love this project – it’s so darn cute! I may just have to try this one and share it too. Thanks so much. Peace.
This is so fun and easy to make…glad you like it
How far in advance can you make these? Do you know how long they will keep?
Rachael,
Honestly, I don’t know. The only thing I can suggest is make a few and test them. I usually just make them and hang them right away or a day or two later. I don’t see why they wouldn’t keep long term but I don’t want to promise…sorry
I have made these for my wedding favors thanks to you!! Quick question…how do I keep them fresh for a week or so until the big day? I made a few and they got moldy alon the bottom sitting out. Could I refridgerate them?
Thanks for your help!!
Rachael, I shouldn’t have said I hang them right away, what I meant is when they are dried out really well I hang them.
Hi Jennifer,
I’ve never seen them get moldy. The only reason I can think why that would happen is if they didn’t dry well on both sides and the consistancy was to wet.
I’ll make them again and measure the dry time and let them sit out for a week. Flip them while they are drying ….maybe even give them a jump start with a blow dryer on cool setting.
I wish I was there to help you. How many are you making?
I just made a batch today, I’m going to try drying them on a cookie rack so they get air on both sides and then wrapping them and freezing them. My wedding is 7 months away but I’d rather make them a little bit in advance just so I don’t have to worry about them as it gets closer to the wedding. I’ll let you all know how it turns out with drying and freezing the batch I made today.
Thanks for the feedback!
Rachael,
I’m getting married in October and llike you I am thinking of making them in advanced! Please let me know how it works out for you!!
I added some instruction updates to the post. I emphasized the importance of flipping the ornament during dry time and making sure they are completely dry!
Gail,
I let mine dry out on a cookie rack and I’ve just left them out.. I made them on the 9th. They seem like they will be fine made in advance.. I’ll let you know if they fall apart or anything.. :-\
Thank you for the update…did they get really hard? Mine got harder the longer they dried.
how much did this project cost you? I am making some, with a snowflake mold/ cookie cutter, for a snowflake themed baby shower. And I am making them for about 70 people.. I am trying to get a price range?
My friend dried hers on cookie drying racks and it seemed to work great….can’t wait to make these as christmas gifts!
These are awesome! We made many double batches for Christmas present decorations and to hang on our sad bare winter tree outside, give as teacher’s gifts, etc. The birds love them and so do the people that got them for presents. Doubling the batch I used 2 1/2 cups birdseed, 1/2 cup water, and 2 little packets of knox. Don’t do more than 2 batches at once because it will dry too much before you can fill the cookie cutters. Dried them on racks. They kept great.
Can you dry these in the oven? I need to make about 200 of these for an April wedding.
I’ve never tried drying them in the oven.It sounds like a really good idea, if temp is set very low. Let me know if you do it, and how it works out.
How can you dry a bird seed wreath or bell sufficient to keep it from molding? A couple of my larger creations always seem to get moldy in spots. I put them on a wire drying rack but mold still seems to find its way there (never on the smaller things, just the large/thick ones).
Pat,
I’m not sure what to tell you. I wonder if drying a larger one in the oven would work. I’ve never had it happen but then again I’ve never made a really large thick one. I would think the whole trick is to get it totally dry. It’s probably not drying in the middle. Wonder if you could blow dry them… hmmm. Or put them in a food dehydrator.
i would love to try this. i will dry mine on a cookie rack. i bet where in the house they are drying out makes a big diff. for example i would not dry them in a place that is warm, or has moisture like near a cooking area or near a running appliance. i think this can cause the wet seed to become moldy. i don’t know if this is what is causing the mold, but it’s a thought.
blessings,
aimee
I love this idea! I was going to do a trial run today to see if they would work for my wedding favors. I was able to get everthing except for the Knox. Where can I find that? I looked at Hobby Lobby, Walmart and Target. Maybe I’m looking in the wrong place?
Hi Jana…you can find it at the grocery store…usually near the jello and pudding section. Hope that helps
Hi Jana…Unflavored gelatin works just as well as Knox. It’s located with the Jell-O and pudding. My family lives in the country so my granddaughter and I made several Christmas ornament baskets for gifts this year. We also used a mini bundt cake pan and made a wreath as the center piece of my baskets with smaller Christmas ornaments. We then wrapped each one in cellophane and they turned out to be the best Christmas gifts ever. We’re now in the process of making some new baskets for Valentine’s Day using a large heart shaped cake pan and some smaller heart shaped cookie cutters for the smaller ornaments. These gifts are much healthier than giving candy to your loved ones. They also provide a great source of entertainment for everyone.
We’re always open to other birdseed gift ideas!!
I love these and I’m going to make about 300 of them for my daughters wedding to give as favors!
Our daughter decided to make some treats for the birds…and to share some of the homemade all-natural popcorn balls we made for ourselves (see our post http://www.wordplayhouse.com/2011/02/snowball-popcorn-balls.html), but I wanted to include some healthy (and fun-to-make) options for the birds. We included a link to your site on ours here http://www.wordplayhouse.com/2011/02/treats-for-the-birds.html. I hope you stop by our site often and I’ll be back to visit yours as well.
I am so excited to make these! Sooo cute! Found them on etsy and then luckily found your site before I bought any! Thanks for posting!!
Hi Lenzie! I’m glad you found this recipe…read the comments for more fun tips and advice
I am so happy to have found this post! I am planning to make these as favors for my daughter’s first birthday party. (We planned a bird/spring themed party!) In looking at the date on your post, it was almost meant to be… you wrote this post the day she was born! I can’t wait to try it! Thank you!!
Chrissy…so glad you found me and how cute that your daughter was born on the say day the post was written!! Have fun making some birdie treats!!
Excellent Earth Day project!! I’m so glad I found you. I’ll let you know how they turn out and will take note of the mold prevention tips!
Liza..yes the main thing is to dry them out really really well!!
Just a thought….We don’t have that much humidity where we are…so I’m not even sure how that will effect people around the globe.
I’m thinking the drying process will take longer in humid areas….not that yours is…I just thought of that additional tip.
Hi! Thank you for this great idea! I made them about a week ago, but the birds have not been eating it
Did you have any issues with birds actually wanting to chow down??
It takes a little while for the birds to find the ornament. Mine took about 3 days brfore they found out it was for them I’m kind of suprised that after a week they haven’t figured it out.
After mine located the ornaments they didn’t last very long… Sorry yours aren’t eating. I wonder if it has to do with the time of year and the type of seed hmmmm puzzled.
did anyone have any luck with drying them in oven and freezing them. I was trying to make these favors a head of time as well but they got moldy on me. I wondered if these methods worked for anyone not wanting to be stressed the week before wedding.
Thanks so much
shanna,
so sorry you are having a mold problem. I’ve never tried a long term freezing method like you did. That was one of my biggest fears that someone would make them in advance and have a stressful issue for a wedding. Sorry, I tried to explain and warn everyone with as much info as possible. I really believe air drying for long term makes the most sense as long as it isn’t a humid enviroment. The grocery store has bird seed ornaments and they are on the shelf for months, but are totally dried out.
Hi everyone! This was a great idea! I am getting married this coming Friday and are using these as my wedding favors. We made them in bulk and doubled the receipe for a larger quantity and it worked fine. Had to let it sit longer in the pot but once it became moldable it was quit to get in the mold and move quickly. it also helped to have your hands dipped in water and or your spoon to flatten out the top of the mold to make it look nice, made it stick less to your hands. also, to let dry we used a raised cookie sheet so no mold. we made about 80 in 2 1/2 hours, there were only two of us and we shared about 6 different kinds of molds, but the heart definitely worked the best. if anyone wants pictures i will check back, but just wanted to say thanks for the idea! it worked great!